You may also like: Daily Deals on Amazon, More on Garage & Automotive, Great Products For Your Car
Are you tired of working on DIY projects inside your cramped home? It’s time to take your craft to the next level with a small garage workshop! But where do you even start? Fear not, my friend, because in this blog post, we’ll give you tips and tricks on how to set up your dream DIY space. From planning the layout to stocking up on tools and safety gear, we’ve got you covered. So let’s rev up those power tools and get started!
Assessing Your Space: What You Need to Know Before You Start
Before you dive into setting up your small garage workshop, it’s important to assess your space and what you need from it. Here are some things to consider:
- Size: How much space do you have to work with? A single-car garage may be enough for a small workshop, while a double-car garage may offer more room for larger projects.
- Noise: Will your workshop create a lot of noise? Consider soundproofing your garage or adding insulation to help reduce the sound.
- Ventilation: Adequate ventilation is important for your safety and comfort. Make sure you have windows or fans to circulate air and clear out fumes.
- Electrical Outlets: You’ll need plenty of electrical outlets to power your tools and equipment. Consider hiring an electrician to add more if needed.
Planning Your Layout: Tips for Making the Most of Your Small Garage
Once you’ve assessed your space, it’s time to plan your workshop layout. Here are some tips:
- Create zones: Divide your space into different zones for different purposes, such as storage, workbench, tool wall, and machinery area.
- Think about workflow: Arrange your tools and equipment in a way that makes sense for the projects you’ll be working on. Keep frequently used items within easy reach.
- Mind the height: Make use of vertical space by adding shelves and overhead storage. Consider the height of your tools and equipment and adjust accordingly.
Set up Your Workspace: Creating a Comfortable and Functional Work Area
Your workspace is where the magic happens. Here are some tips on how to create a comfortable and functional area:
- Invest in a good workbench: Your workbench should be sturdy and have plenty of surface area for your projects.
- Add seating: Consider adding a stool or chair to your workspace for when you need a break or to work on smaller projects.
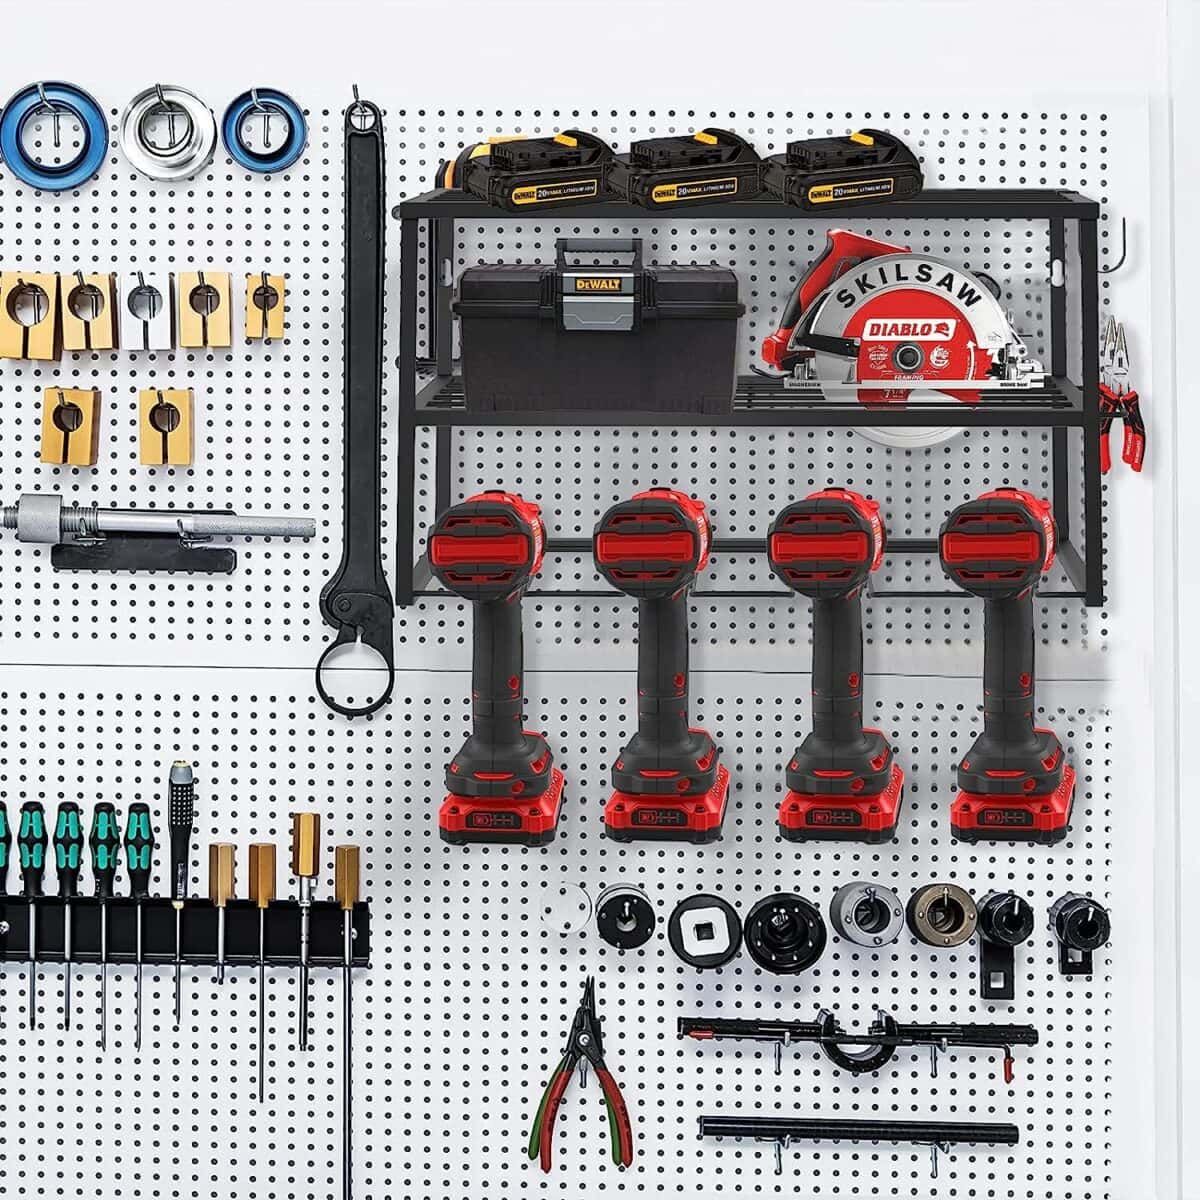
- Organize your tools: Keep your frequently used tools within easy reach by using a pegboard or tool wall.
Make Sure You Have Adequate Lighting: Seeing Clearly While You Work
Adequate lighting is essential for any workspace, especially for precision work. Here are some tips for lighting your small garage workshop:
- Add overhead lighting: Install bright LED lights or fluorescent fixtures to evenly illuminate your workspace.
- Invest in task lighting: Use desk lamps or clip-on lights to light up specific areas of your workspace when needed.
- Consider natural light: If you have windows, make sure they’re not blocked and let in as much natural light as possible.
Consider Your Garage Flooring: Choosing the Right Surface for Your Workshop
The right flooring can make a big difference in your workshop. Here are some options to consider:
- Epoxy coating: A durable coating that can withstand oil spills and heavy machinery.
- Interlocking tiles: Easy to install and replace, these tiles come in different colors and textures to customize your space.
- Concrete stain: A low-maintenance option that comes in a variety of colors and can give your garage floor a new look.
Build Storage for Tools and Supplies: Keeping Everything Organized and Accessible
Organization is key in any workspace. Here are some tips for building storage in your small garage workshop:
- Use shelving: Metal or wooden shelves can hold tools, supplies, and even small machinery.
- Create a tool wall: Use a pegboard or slat wall to hang frequently used tools within easy reach.
- Make use of cabinets and drawers: Store larger items and supplies in cabinets or drawers to keep them out of the way but still within reach.
Stock Your Workshop With Tools: Essential Tools for Every DIY Enthusiast
No workshop is complete without a set of essential tools. Here are some items you should consider investing in:
- Power drill: Useful for drilling pilot holes, driving screws, and more.
- Saw: Whether it’s a circular saw, jigsaw, or miter saw, a saw is essential for cutting wood and other materials.
- Measuring tools: A tape measure, level, and square are all necessary for precision work.
- Hand tools: A set of screwdrivers, pliers, and wrenches will come in handy for various tasks.
Remember, there are many other tools available depending on your specific needs and projects. Don’t forget to do your research!
Don’t Forget Safety Gear and Cleaning Supplies: Protecting Yourself and Your Space
Safety should always be a top priority in any workspace. Make sure you have the following safety gear on hand:
- Safety glasses or goggles
- Hearing protection
- Dust masks
- Gloves
Cleaning supplies are also important to keep your workspace tidy and safe. Here are some items to consider:
- Broom and dustpan
- Wet/dry vacuum
- Cleaning solvents
- Rags and towels
Maintaining Your Workshop: Tips for Keeping Your Workshop in Top Shape
Maintenance is key to keeping your workshop functioning smoothly. Here are some tips:
- Clean up after each project: Sweep up debris, wipe down surfaces, and put away tools.
- Regularly inspect your equipment: Look for signs of wear and tear, and replace or repair as needed.
- Maintain your flooring: Clean up spills promptly and reseal or recoat as needed to keep your flooring in good condition.
Conclusion: Enjoying Your Dream DIY Space
Setting up your small garage workshop can be a daunting task, but with these tips and tricks, you’ll be well on your way to creating the DIY space of your dreams. Remember to take your time, plan ahead, and invest in quality tools and equipment. Happy crafting!